Summary: Migrating data from Azure Blob Storage to SharePoint is a common requirement for users who want better accessibility and management of their files. However, performing this migration can be challenging without the right approach.
This blog will guide users on how to migrate Azure Blob to SharePoint using both manual methods and a professional solution for a smooth and efficient process.
Azure Blob Storage is a cloud-based storage solution designed to store large amounts of unstructured data, such as documents, images, videos, and backups. It is widely used by organizations to manage and access data efficiently across different applications and services.
On the other hand, Microsoft SharePoint is a powerful collaboration platform that allows users to store, organize, and share files within teams. It provides features like document management, version control, and secure access, making it an ideal platform for centralized data handling.
In many scenarios, users need to move data from Azure Blob Storage to SharePoint to improve accessibility and streamline file management. This process involves transferring files from blob containers to SharePoint libraries in a structured manner.
Reasons to Migrate Azure Blob to SharePoint
There are several reasons why users choose to migrate Azure Blob Storage to SharePoint. Some of the common ones are:
- Better Collaboration – SharePoint allows multiple users to access, edit, and share documents in real-time, which is not easily achievable with Azure Blob Storage alone.
- Centralized Document Management – By moving data to SharePoint, users can organize files in a structured way using libraries, folders, and matter attachments, making data easier to manage.
- Integration with Microsoft 365 – SharePoint integrates seamlessly with Microsoft 365 tools like Outlook, Teams, and OneDrive, allowing users to work more efficiently within a connected environment.
- Improved Accessibility – Files stored in SharePoint can be accessed from anywhere with proper permission, making it convenient for remote teams and businesses.
- Advanced Search and Version Control – SharePoint offers powerful search capabilities and version history features, helping users track changes and quickly find required files.
Manual method to Copy Files from Azure Blob Storage to SharePoint
There is no direct built-in option to migrate Azure Blob; users rely on different manual approaches. Below are two commonly used methods:
Method 1: Using Azure Logic Apps
Azure Logic Apps can be used to automate the process of copying files from Azure Blob Storage to SharePoint.
- Create a Logic App in the Azure Portal.
- Connect it with Azure Blob Storage.
- Set a trigger to detect new or modified files.
- Add an action to retrieve blob content.
- Connect to SharePoint and create files in a document library.
- Save and run the workflow to start the process.
This method is useful for automating file transfers when new data is added to Azure Blob Storage.
Method 2: Using PowerShell Script
Another way to migrate Azure files to SharePoint is by using PowerShell scripting, which is suitable for advanced users.
- Connect to SharePoint using PnP PowerShell.
- Authenticate the Azure account and access Blob Storage.
- Download files from Azure Blob to a local system.
- Upload the files to the SharePoint document library.
- Apply metadata (if required) during upload.
This method allows more control over the migration process but requires technical knowledge.
Drawbacks of Manual Methods
Although manual methods can help to migrate Azure Blob to SharePoint, they come with several limitations that can make the process difficult and inefficient:
- Manually copying files from Azure Blob Storage to SharePoint can take a significant amount of time, especially when dealing with large volumes of data.
- Methods like PowerShell scripting and Azure Logic Apps require technical expertise, making them difficult for non-technical users.
- There is always a possibility of missing files, incorrect transfers, or errors during the process when handling data manually.
- While Logic Apps provide some automation, managing and monitoring the workflow continuously can be challenging.
- Manual approaches are not ideal for bulk migration, as they can slow down the process and increase the chances of failure.
Professional Method to Migrate Azure Blob Container to SharePoint
An alternative approach is to use a dedicated solution that simplifies the migration process and reduces manual effort. The Shoviv Azure Blob Storage Migration Tool is designed to handle Azure Blob to SharePoint migration in a more efficient and organized manner.
It allows users to transfer data directly from Azure Blob Storage to SharePoint without the need for complex configurations or scripting knowledge. The tool is suitable for both technical and non-technical users, making the migration process easier to manage.
Features of Shoviv Azure Blob Storage Migration Tool
The Shoviv Azure Blob Storage Migration Tool offers a range of features that simplify the migration process and improve overall efficiency:
- It allows users to migrate multiple Azure Blob containers to SharePoint in a single process without any data limitations.
- Users can transfer data not only to SharePoint but also to various other platforms, providing flexibility in data management.
- The tool includes customizable filters that help users migrate only specific data based on their requirements.
- Designed for both technical and non-technical users, the tool offers an easy-to-use interface for smooth operation.
- Users can schedule migration tasks according to their preferred time, helping in better planning and execution.
- It supports running multiple migration jobs at the same time, saving time and effort.
Step-by-Step Process to Migrate Azure files to SharePoint
Time needed: 2 minutes
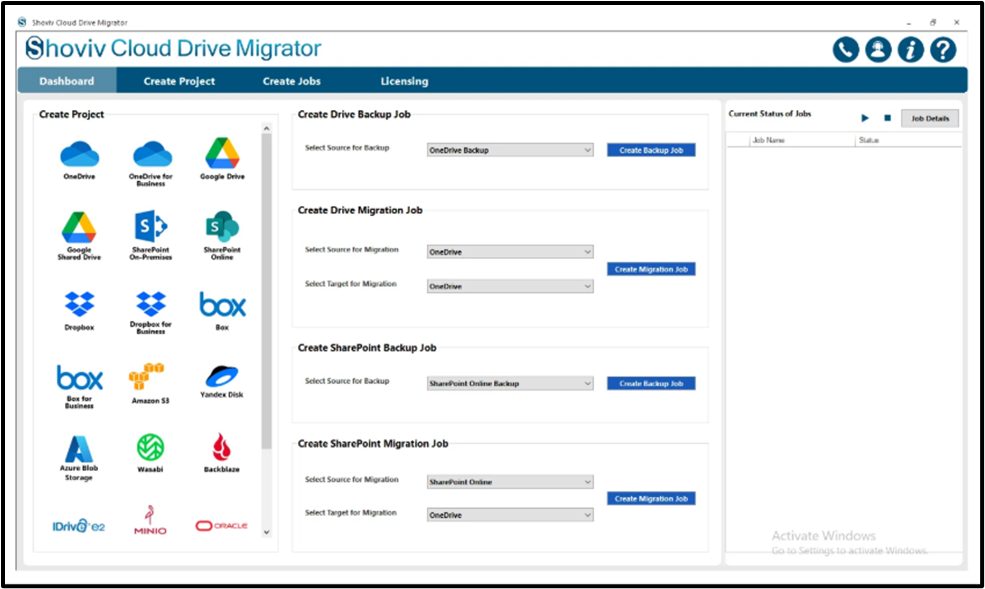
- Install and Launch the Software
Download and open the Shoviv Azure Blob Storage Migration Tool on your system.

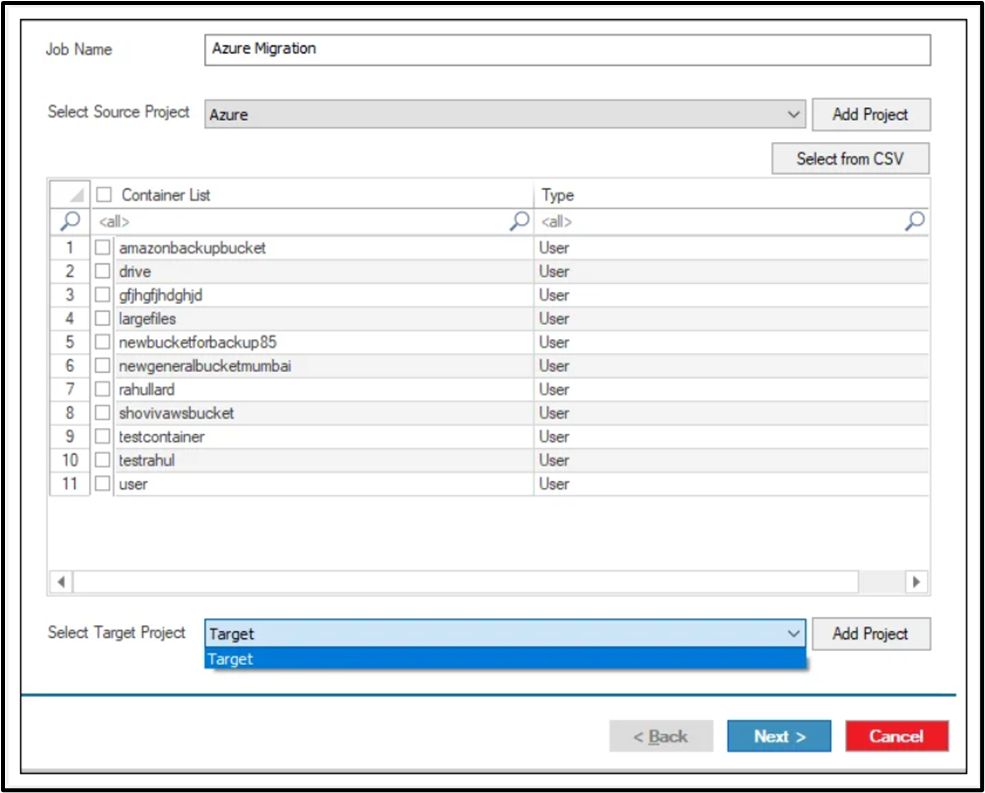
- Create a Migration Job
Connect with a Source and Target project.

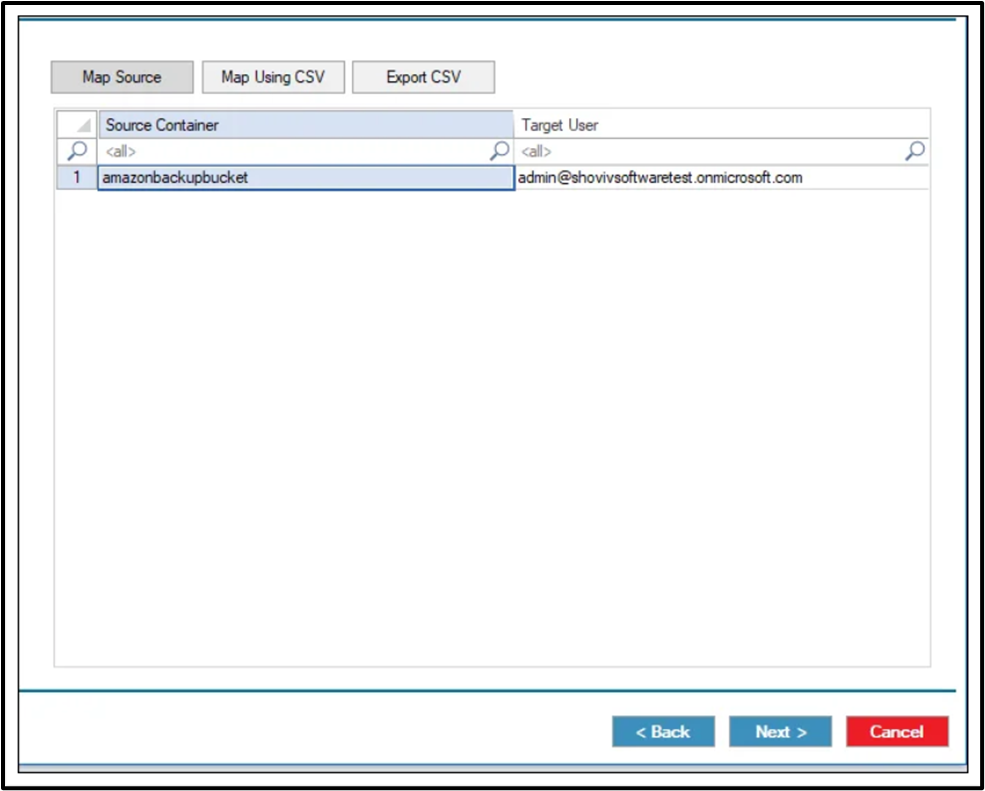
- Mapping
Select the source container and target site, then map them.

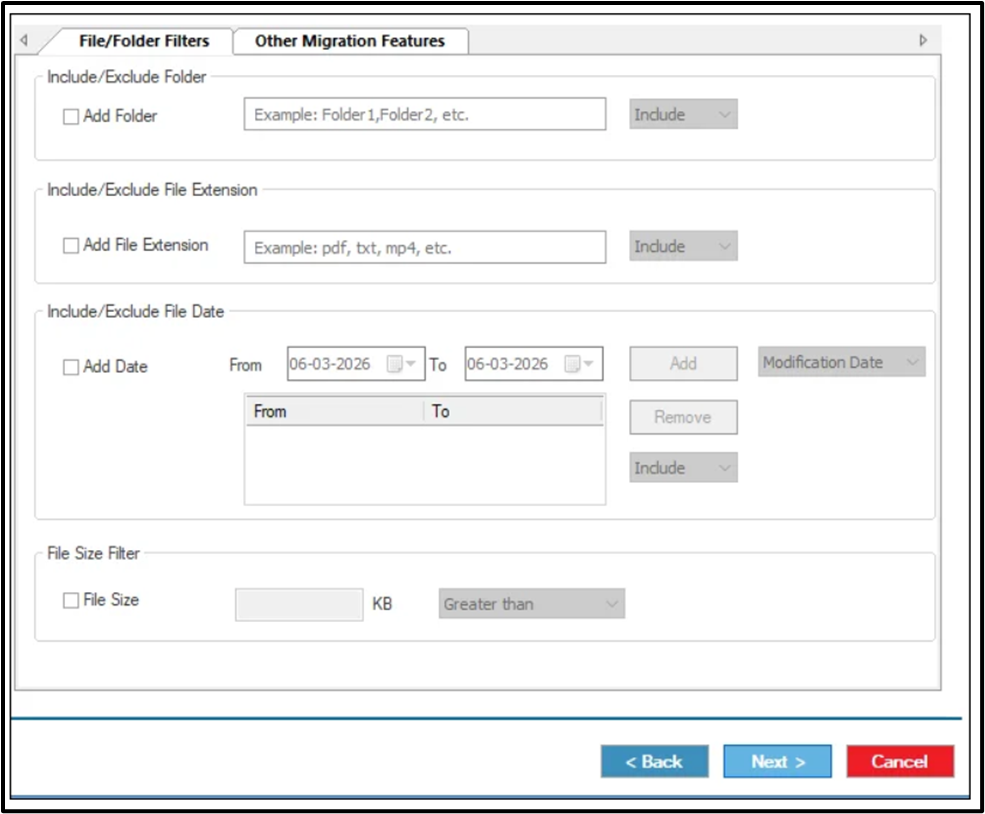
- Apply Filters (Optional)
Use the filter options to include or exclude specific files based on your needs.

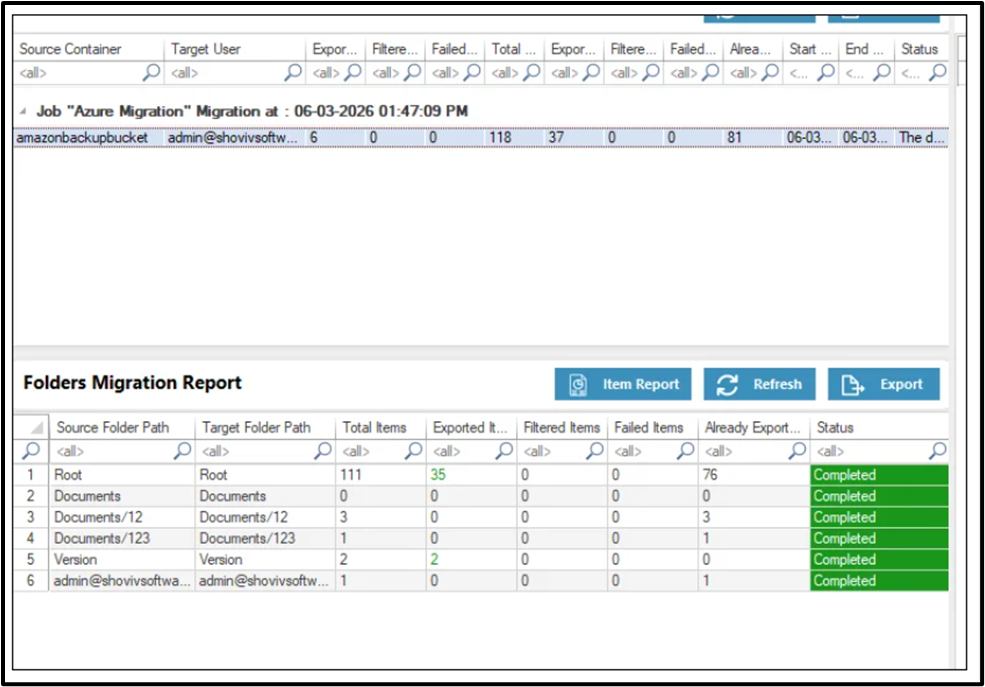
- Start the Migration Process
Run the migration job and monitor the progress through the dashboard.

- Verify Migrated Data
Once the process is completed, check the data in SharePoint to ensure everything is transferred correctly.
Conclusion
This blog explained how to migrate an Azure Blob Container to SharePoint using different approaches. Manual methods like Azure Logic Apps and PowerShell can help in transferring data. Still, they often require technical knowledge and can become time-consuming for large-scale migration.
A professional solution simplifies the entire process and reduces the effort involved. The Shoviv Azure Blob Storage Migration Tool provides an efficient way to migrate Azure files to SharePoint with better control and ease of use. Users can choose the method that best fits their requirements. Still, a dedicated tool offers a more practical and reliable approach.
Frequently Asked Questions:
You can use methods like Azure Logic Apps or PowerShell scripts to copy files from Azure Blob Storage to SharePoint.
No, there is no direct built-in option, so users need to rely on manual approaches or professional solutions.
Manual methods can handle data migration, but they may become slow and difficult when dealing with large volumes of data.
Using a professional tool is generally easier as it reduces manual effort and simplifies the migration process.
Yes, it allows users to migrate multiple containers and large amounts of data efficiently.
Yes, with a professional solution, users can apply filters to migrate only specific data based on their needs.