Summary: Managing permissions within SharePoint helps protect sensitive data and keep work organised. With the help of customized permissions in SharePoint, you can control who can view, edit, or manage sites, libraries, folders, or documents. Breaking inheritance creates unique permissions, while restoring it removes them. Tools like the Shoviv SharePoint Migration Tool reduce errors and save time.
Customize Permission in SharePoint: All Dimensions
Most data should not be available to everyone in an organisation. When leaders do not control access, it can lead to data leaks. To manage this problem, SharePoint provides a permissions feature, but managing these permissions is also not very easy. As we see, many users frequently search for topics such as Customize permissions in SharePoint Online, SharePoint document library permissions, SharePoint permission levels, SharePoint list permissions, unique permissions in SharePoint, etc.
Customize Permission in SharePoint
Customising permissions in SharePoint allows you to control and manage who can access your content and data, such as who can edit, read, or comment. By breaking inheritance and assigning access at the site or item level, organisations can create secure, role-based spaces for collaboration. With the help of SharePoint groups and permission levels, the right people get the right access, which improves both security and productivity for the organisation.
What Are Permission Levels?
SharePoint provides predefined sets of rights that decide what users or groups can do. These predefined sets are called permission levels.
- Full Control
- Design
- Edit
- Contribute
- Read
- View Only
- Limited Access
What Are Unique Permissions?
Unique permissions in SharePoint are created when you break permission inheritance. This allows you to give specific users or groups different levels of access to a site, library, folder, or individual document.
This provides users with greater control, ensuring sensitive content is only available to authorised users while maintaining collaboration elsewhere.
Now you might have another question: How do you assign unique permissions? Let’s explore that as well.
- Go to the site, library, folder, or document you want to manage.
- Click on Settings or More Options and choose Manage Access Permissions.
- Select Advanced Permission Settings.
- Click Stop Inheriting Permissions. This process creates unique permissions.
- Remove users or groups you do not want.
- Add the users or groups you want and choose their permission levels (Read, Edit, etc.).
Now only the selected people can access that content.
Note: Inheriting permissions means an item uses the same access rules as its parent without any changes.
How to Delete Unique Permissions in SharePoint?
To delete unique permissions in SharePoint and go back to normal access:
- Open the site, library, folder, or document with the unique permissions.
- Click on Settings or More Options, then Manage Access, and go to Advanced Permissions.
- Select Delete Unique Permissions or Restore Inheritance.
- Confirm the action.
This removes custom access settings and restores the parent permissions for further processing.
In SharePoint, not every file, folder, or site needs to be accessible to everyone. Unique permissions let you control access, and deleting them restores normal parent-level access. Now it is time to move forward to customise SharePoint permissions to control who can see, edit, or manage content. This ensures security, reduces clutter, and helps your team work smarter, not harder.
Why Do We Need to Customize Permissions in SharePoint?
- It protects sensitive data from unauthorised access.
- It reduces clutter so employees see only relevant information.
- It prevents accidental edits or deletions.
- Moreover, it ensures the right people have the right access.
Ultimately, it makes collaboration safer, smoother, and more organised.
How to Apply Customised Permissions?
- Go to the content. Open the site, library, folder, or document you want to manage.
- Open Permission Settings. Click Settings, then Manage Access, and after that select Advanced Permissions.
- Break inheritance by clicking Stop Inheriting Permissions to create unique access.
- Remove unwanted users by deleting users or groups who should not have access.
- Assign them the correct permission level, such as Read, Edit, etc.
- Confirm to apply the permissions in a customised way.
This allows you to control exactly who can see or edit each part of the SharePoint content.
Manage Permission While Migrating SharePoint
However, managing this process can be complex. If you are looking to simplify the process of customising permissions to save time and improve productivity, Shoviv SharePoint Migrator makes it fast, safe, and hassle-free. It helps you easily move permissions for sites, libraries, documents, and even version history. Save time, reduce errors, and upgrade your collaboration effortlessly with the Shoviv SharePoint Migrator.
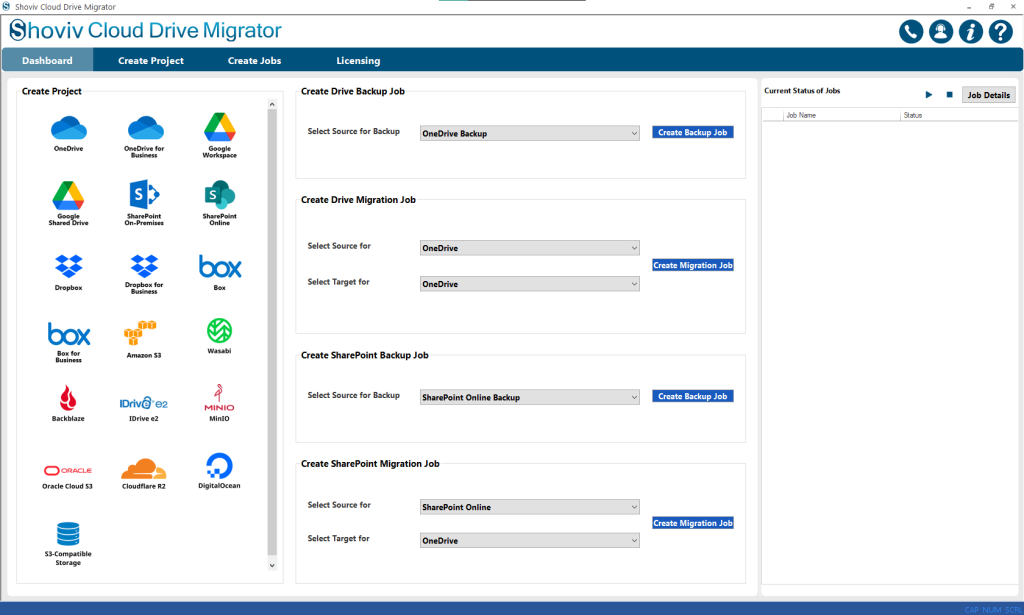
Highlighted Features of Shoviv SharePoint Migration Tool
- The Shoviv SharePoint Migration Tool supports migration from SharePoint to SharePoint (all versions), OneDrive, Google Drive, Google Shared Drive, Box, Dropbox, Amazon S3, etc.
- It works on a job basis; within one job, you can add multiple sites and run them simultaneously.
- You can schedule the job according to your needs.
- With the help of filters, you can refine your migration process or job creation.
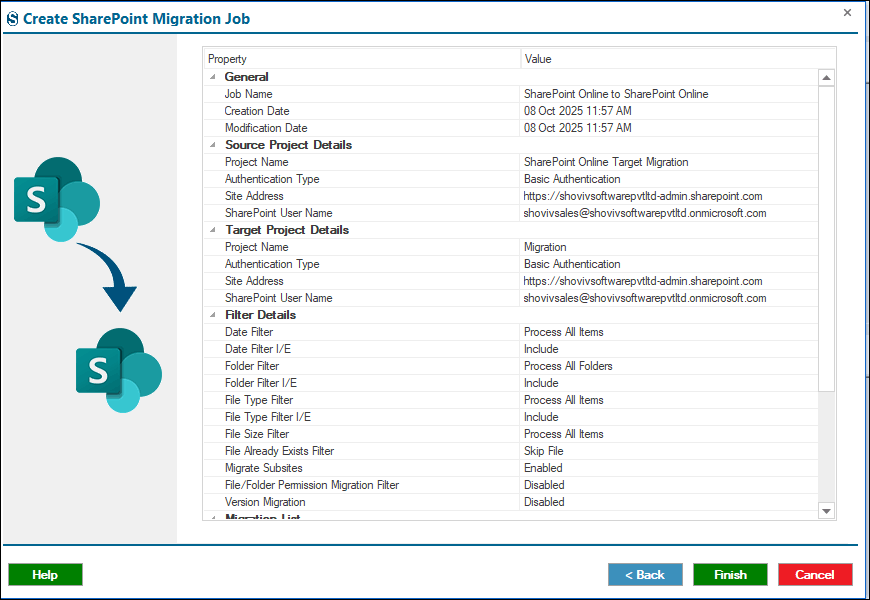
- Shoviv’s SharePoint Migration Tool also allows users to preview job details before the job runs.
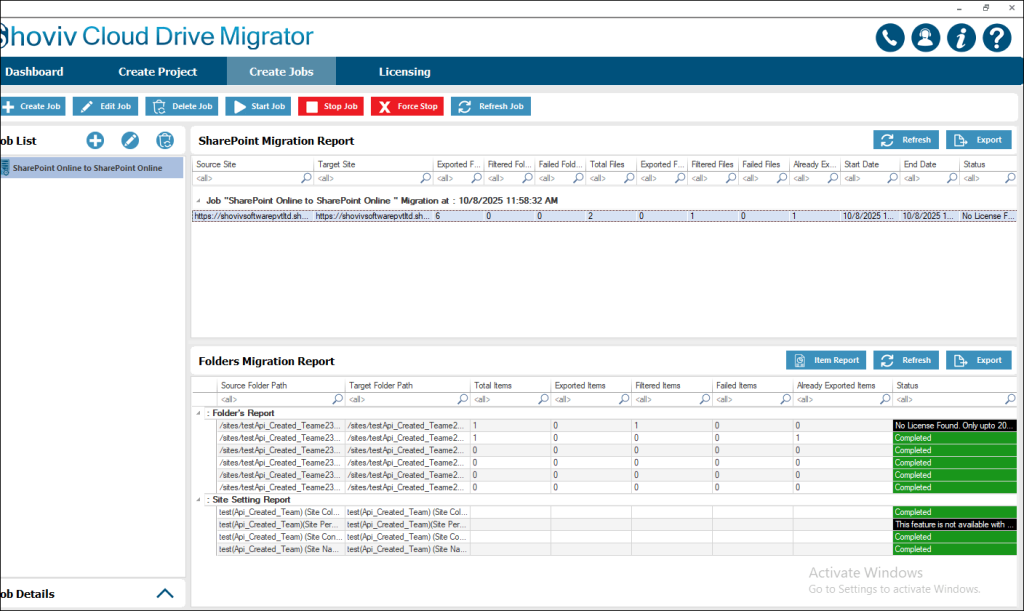
- Additionally, it generates reports after the job is completed.
- Shoviv provides a demo version that allows users to test filters and settings. It supports 500 MB per site and processes files under 20 MB.
- Moreover, the tool provides a user-friendly interface and 24/7 technical support.
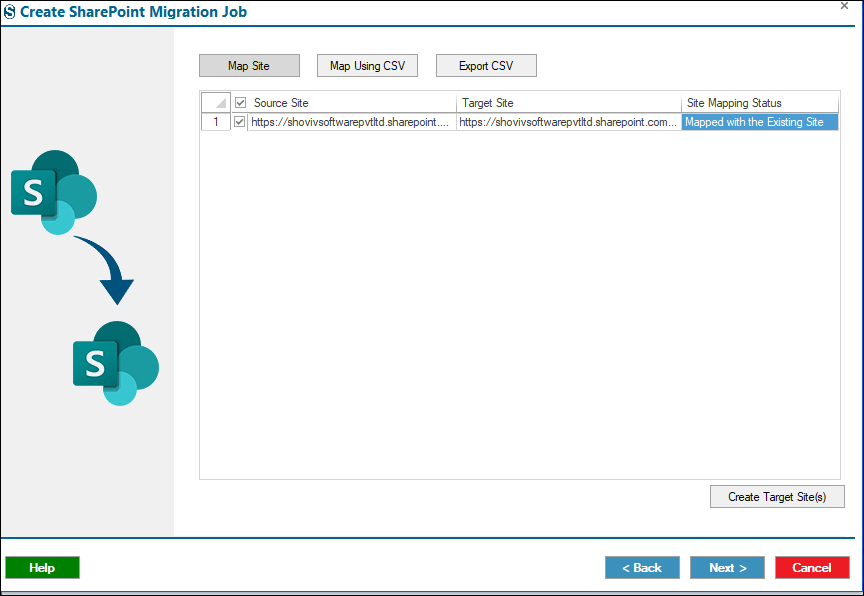
Steps on How to Migrate Permissions in SharePoint
- Install and run the Shoviv Cloud Drive Migrator/ SharePoint Migrator.
- Connect the Source and Target Project.
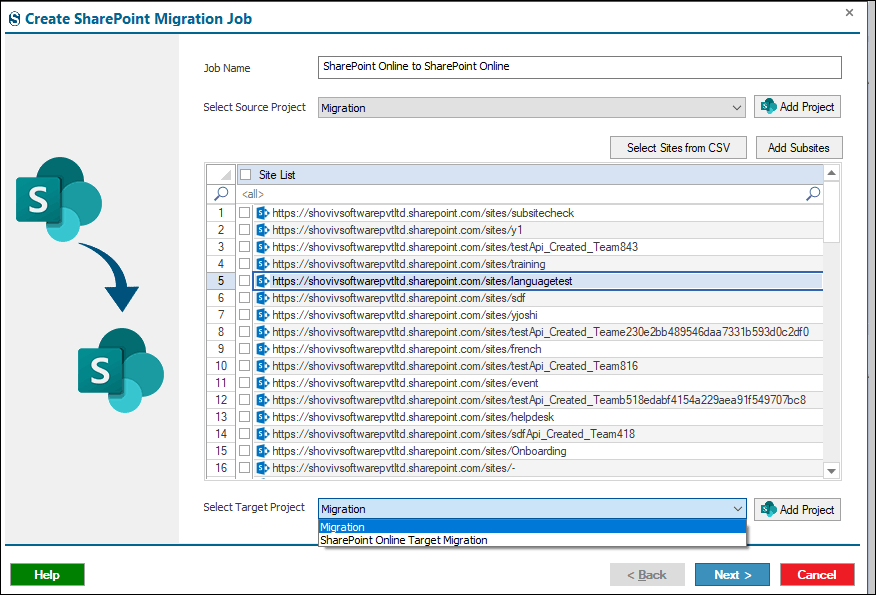
- Map the Source and Target Sites.
- Refine the migration process using the Filters page.
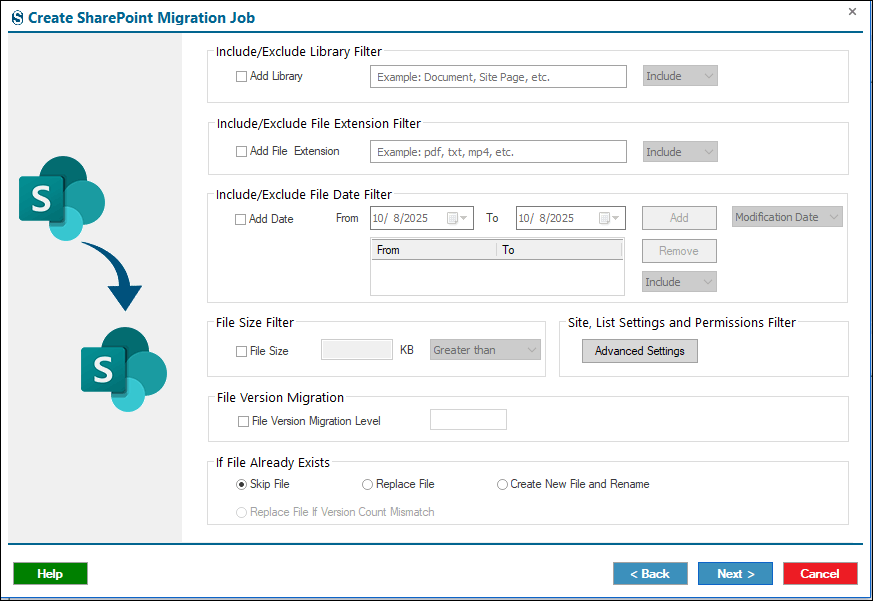
- On the Filters page, you will find Advanced Settings, where you can manage permissions such as:
- Migrate Site Column
- Migrate Site Content Types
- Migrate Site Collection Features
- Migrate Quick Launch
- Migrate Home Page
- Migrate Site Settings
- Migrate Site Permission Level
- Migrate Subsites, etc.

- After that, use the Settings options to manage job details and run the job in an automated way.
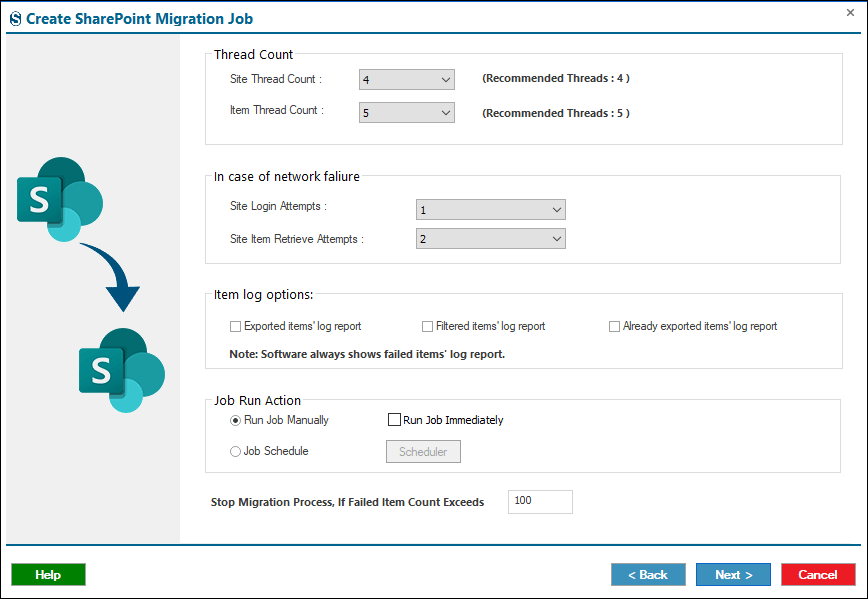
- Review the job details.
- The job will run according to the filters and settings that have been configured.
Conclusion:
In conclusion, customising permissions in SharePoint is essential for protecting sensitive data, reducing clutter, and ensuring the right people have the right permissions. While managing permissions while migrating can be complex, tools like the Shoviv SharePoint Migration Tool make the process faster, safer, and more efficient, helping teams collaborate smoothly and work smarter.


