Microsoft 365 offers cloud-based collaboration services, and SharePoint Online is one of them. It has also been adopted by millions of users all over the world. Migration has been increasing recently due to mergers, acquisitions, tenant consolidation, or any other scenario. Whether you are looking for any reason, this blog will focus on providing a deep understanding of the solutions. Here, we will share a detailed guide on how to accomplish the SharePoint Online to SharePoint Online migration task. Let us start with the reasons behind this task.
Why proceed with the SharePoint Site Migration?
There can be a lot of reasons behind moving SharePoint Online to SharePoint Online. Know them by going through the below points:
- The migration helps users streamline communication and business workflow when two companies merge.
- If a company splits or sells a division, migration is needed in this scenario.
- Organization rebranding or structure modification is also a reason behind the SharePoint site migration task.
- Large Organizations usually have multiple tenants; therefore, the transfer is crucial for tenant consolidation to reduce overall costs and seamless management.
Users may have other things motivating them for migrating SharePoint site to another site task.
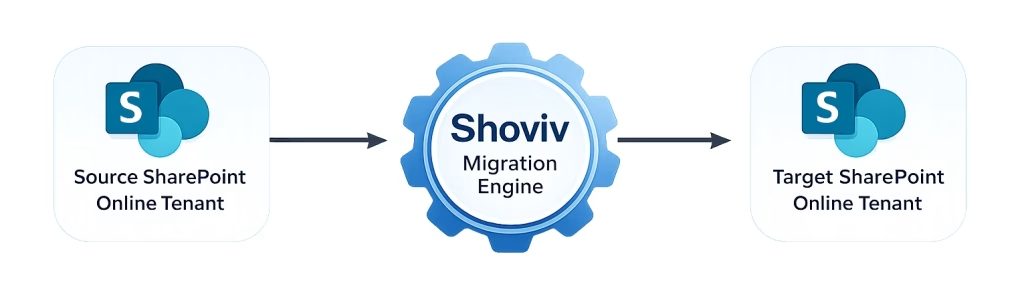
Phase 1: The Pre-Migration Assessment Framework
Before initiating a SharePoint-to-SharePoint move, you must conduct a deep-dive audit of the source environment. This isn’t just a “quick look”—it’s a systematic scan to identify potential “blockers” that could cause the migration to fail mid-process.
What to Include in Your Assessment:
- The SharePoint Assessment Scan – Use native tools or professional scanners to generate a comprehensive report on your site collections. You are looking for:
- Large File Flags – Files exceeding 250GB or libraries with more than 30,000 items (which can trigger list view threshold issues).
- Custom Scripts & SPFx Solutions – Identify any custom-coded web parts or “classic” features that may not be compatible with the target modern UI.
- Orphaned Users – Pinpoint data owned by users no longer in the Active Directory (Entra ID). If these aren’t mapped, the migration might stall or strip away permissions.
- Site Hierarchy Mapping – Document the current structure. Are you moving “as-is,” or is this an opportunity to flatten a complex sub-site hierarchy into a modern hub-and-spoke model?
- Workflow Compatibility – Check for legacy SharePoint 2013/2010 workflows that are being retired. These will not migrate and must be rebuilt in Power Automate.
Phase 2: Identity Mapping & Permission Strategy
In a SharePoint environment, every file, folder, and list item is tied to a specific User Identity (SID/UPN). If you move data without a strategy to “translate” these identities from the Source Tenant to the Target Tenant, the metadata and permissions will effectively “break,” leaving your data orphaned and your users locked out.
1. Handling Source-to-Target User Mapping
Identity mapping is the process of creating a one-to-one relationship between a user in the source environment (e.g., user@source.com) and their new account in the target environment (e.g., user@target.com).
- The CSV Approach – Most enterprise-grade migration tools allow you to upload a Mapping File (CSV). This file acts as a directory that tells the migration engine: “Every time you see ‘Author: John Doe’ in the source, change it to ‘Author: John Doe’ in the target.”
- Domain-Wide Delegation – By using a Service Account with Domain-Wide Delegation, you ensure the migration engine has the “administrative right” to impersonate users and re-apply their specific permissions during the transfer.
2. Why “Broken Permissions” are a Migration Nightmare
Without proper mapping, you face two major issues that lead to massive post-migration helpdesk tickets:
- Loss of Metadata – Files will show “Created by: System Account” instead of the original author. This destroys audit trails and version history context.
- Broken “Shared With” Links – In SharePoint Online, collaboration relies on unique sharing links. If the user identities aren’t mapped, every “Shared with me” folder in the target tenant will return a 404 error or Access Denied, halting production for entire departments.
3. Strategic Permission Handling
An experienced admin doesn’t just “copy” permissions; they audit them.
- The “Clean Slate” Opportunity – Use the migration to strip away “Limited Access” permissions or legacy “Guest” access that is no longer needed.
- Inherited vs. Unique – Ensure your strategy accounts for Broken Inheritance. If a sub-folder has unique permissions that differ from the parent site, your migration tool must be capable of detecting and replicating that specific security ACL (Access Control List).
Phase 3: Navigating Microsoft 365 Throttling & Performance Tuning
When migrating massive datasets between SharePoint tenants, you aren’t just moving files; you are competing for resources on Microsoft’s shared infrastructure. To maintain service stability for all users, Microsoft employs Throttling—a server-side mechanism that intentionally slows down data requests if they exceed specific thresholds.
Understanding the “429 Too Many Requests” Error
If your migration engine pushes data too fast, Microsoft 365 will return a 429 error. This is the system’s way of saying “Slow down.” Ignoring these signals can lead to your migration account being temporarily blocked, stalling your project entirely.
Expert Strategies to Optimize Throughput:
- Leverage the Migration API – Rather than using standard “Upload” commands, authoritative migrations use the Asynchronous Metadata-driven API. This allows Microsoft to ingest data into Azure containers first, significantly reducing the “chattiness” of the migration and minimizing throttle triggers.
- The “After-Hours” Advantage – Schedule your heaviest data transfers during off-peak hours relative to the target tenant’s data center region (typically late-night or weekends in the local UTC timezone). This ensures you aren’t competing with the tenant’s daily active users for bandwidth.
- Multi-Threaded Execution – Use a migration engine that supports parallel processing. By spreading the workload across multiple “threads” or “jobs,” you can maximize the allowed bandwidth per user session without hitting the ceiling of a single connection.
Phase 4: Post-Migration Validation Checklist
Establishing trust with your stakeholders means proving that the target environment is a functional mirror of the source. Use this checklist to verify integrity immediately after the cutover:
1. Verify Site Collection Hierarchy
Ensure that the architectural “skeleton” of your SharePoint environment remained intact.
- Check – Do the Subsites, Document Libraries, and Lists follow the original nested structure?
- Pro-Tip – Large migrations can sometimes flatten hierarchies if the migration tool isn’t configured for “Structure Mapping.”
2. Scan for “Broken Links” in Internal Pages
SharePoint pages often contain hardcoded links to other documents or sites within the same tenant.
- Check – Click through high-traffic Navigation Bars and Quick Launch links.
- The Challenge – If you moved to a new tenant with a different URL (e.g., contoso-old.sharepoint.com to contoso-new.sharepoint.com), these links must be updated to avoid 404 errors.
3. Audit Metadata Preservation
Metadata is the “soul” of your data. Without it, you lose your audit trail.
- Check – Verify that the “Created By,” “Modified By,” and “Original Timestamp” fields show the actual historical data, not the name of the Admin account that ran the migration.
- Technical Note – Ensuring these fields are preserved is essential for legal compliance and document versioning.
4. Validate Unique Permissions & Inheritance
This is the most critical security step.
- Check – Spot-check folders with “Unique Permissions” to ensure they didn’t default back to “Inherited” during the move.
- Risk – If sensitive folders (like HR or Finance) lose their unique restrictions, they could become visible to the entire organization, creating a massive security breach.
5. Functional Testing of SPFx and Power Apps
If your SharePoint sites use custom scripts or integrated Power Automate flows:
- Check: Trigger a sample workflow to ensure the “Connections” have been re-authenticated for the new tenant.
How to Migrate SharePoint Online to SharePoint Online?
This migration can be done with the help of various solutions. We will explain each solution’s stepwise guide in this section.
1 Method: Via Download & Upload for Small Volume Data:
Microsoft SharePoint offers the facility to download and upload the data. Users can use this facility to go with the migration task:
- Sign in to the Source SharePoint Online.
- Navigate to the document library or list you want to transfer.
- Then, select the files or folders and tap the Download button.
- The selected data will be downloaded in .zip format.
- Extract the downloaded data from the .zip file to the local storage.
- After that, sign in to the target SharePoint Online account.
- Thereafter, go to the destination (document library or list).
- Use the Upload button to migrate the files or folders.
Limitations:
- It doesn’t preserve file permissions & version history.
- Time-consuming for the large SharePoint data.
2 Method: Power Automate to Migrate SharePoint Online:
Users can also use Power Automate for the SharePoint to SharePoint transfer task. The steps are as follows to proceed with the migration:
- Login to Power Automate: https://flow.microsoft.com.
- Now, you have to create a New Flow.
- Select the Automated Cloud Flow or Scheduled Flow to create the new one.
- Then, go to the Set Trigger section.
- After that, choose the When a file is created or modified in a folder from SharePoint.
- Thereafter, add the action (Create File) for the destination SharePoint Online.
- Set the source & target SharePoint site URL and library/folder path.
Limitations:
- This method can’t migrate full sites, pages, and complex permissions.
- No migration of the file version history to another SharePoint Online.
3 Method: A Professional SharePoint Online Migration Tool – The Best Way
Shoviv SharePoint Migrator is the easiest way to migrate data from SharePoint Online to SharePoint Online. This method works without any limitations and provides the migration of full sites, pages, permissions, and file version history. It is also an easy-to-use solution; new users can also perform the SharePoint to SharePoint transfer task. Users can easily add the source SharePoint site to migrate data into another SharePoint site.
Steps to Move SharePoint Online to SharePoint Online:
- Launch the Shoviv SharePoint Migrator Tool.
- Select the SharePoint Online option from the Dashboard.
- After that, enter the needed details to connect the source SharePoint.
- Once done, tap the (+) button to connect the target SharePoint.
- Type the details for the target SharePoint and tap the Connect button.
- After connecting the source & target SharePoint Online sites, go to the Create Jobs.
- Then, move to the Migration section.
- Select SharePoint Online as the source & the target, and click the Create Job button.
- After that, you have to enter the Job Name and choose the source SharePoint sites.
- Once done, continue by clicking the Next button.
- Map the source SharePoint site to the target SharePoint site and tap on Next.
- Filter the site data and manage the permissions as you want in the target site.
- Then, you can look to modify other changes if needed and click the Next button.
- Ensure the migration settings are correct and proceed with the Finish button.
This is how users can perform the SharePoint Online to SharePoint Online migration without restrictions.
Summing Up the Blog!
In this blog, we have taught different methods to perform SharePoint Online migration tasks. The manual methods, including Download & Upload and Power Automate, have limitations that can make the task risky and time-consuming. Therefore, users should try the Shoviv SharePoint Migration Software to migrate SharePoint Online data seamlessly. To know more about this tool’s functionality, users can also try the free demo version of this tool on their Windows operating system.
Frequently Asked Questions:
A: Shoviv SharePoint Migrator Tool is the best way to migrate data between two SharePoint Online sites.
A: Yes, you can use Microsoft tools, like Power Automate, for the SharePoint to SharePoint site migration. However, this solution has a few limitations. So, use this method if you can compromise with the migration; if not, go with the Shoviv Migrator for SharePoint Online.
A: There are a lot of third-party tools; however, the Shoviv SharePoint Migrator Tool is the secure & quick way for SharePoint data migration.