How can human beings save their beautiful memories? The answer is through your photos, as soon as you read the first line, your mouth gives the answers without performing any operation by your brain. But what happens when that one click has erased all your beautiful memories with your loved ones, achievements, and others?
Therefore, having a strong backup is not just an option, but a requirement. When you transfer photos from Google Drive to an external layer of protection, one that ensures your memories stay safe no matter what.
Now that we understand the need for a backup, let’s explore how you can securely transfer your photos from Google Drive to an External hard drive.
Step- by-Step Guide to Transfer Photos from Google Drive
Step 1- Connect with the External Hard Drive
- Begin by plugging your external hard drive into your system with the help of the USB cable.
- Make sure your system identifies it and appears in your file explorer.
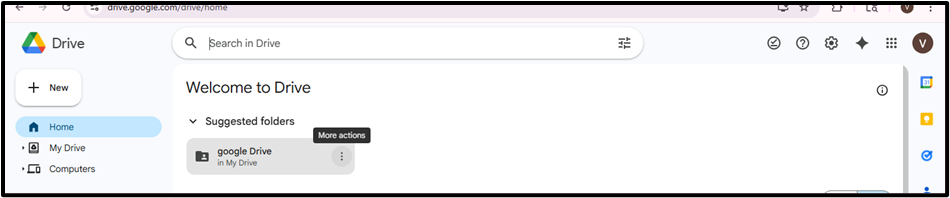
Step 2- Open Google Drive
- You need to go to the Google Drive on your browser and log in to your Google Account.

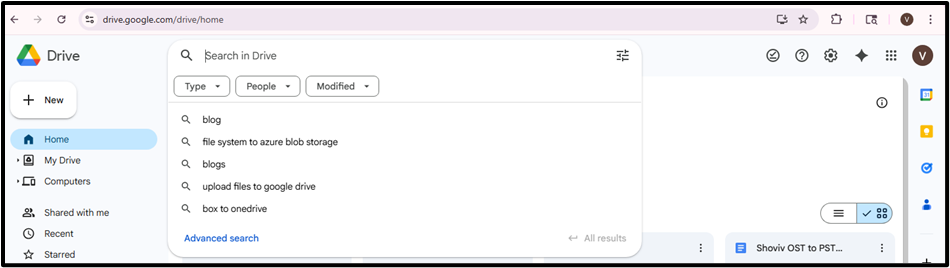
Step–3: Locate Your Photos
- Browse through your Drive and find the photos or folders you want to move.
- You can use the search bar to find the specific files quickly.
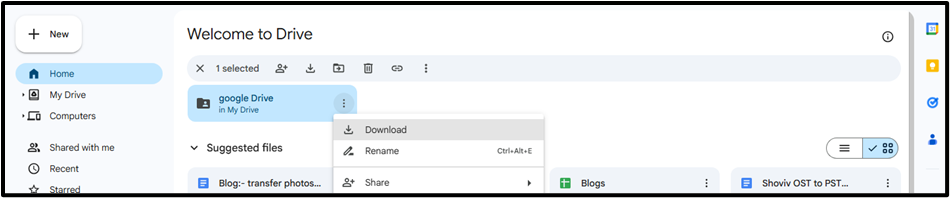
Step 4- Select Files
- You need to select a single photo and then click on it.
- To pick multiple photos, hold the Ctrl key and then click the files.
- To select the entire folder, click on that folder.
Step 5- Download the photos
- If you download multiple files, they will be compressed into a Zip File.
- Wait for the download to be completed.
Step–6: Extract the Files (If Needed)
If your photos are downloaded as a ZIP file:
- Right-click the file
- Click Extract All.
Step 7: Transfer to External Hard Drive
- Open the folder where your photos are downloaded
- Drag and drop the files into your external hard drive
- OR copy (Ctrl + C) and paste (Ctrl + V)
Step 8: Safely Eject Your Hard Drive
Once the transfer is complete:
- Right-click the external drive
- Select Eject
- This prevents data corruption.
Shoviv Google Drive Backup Tool
The manual method is a monotonous, time-consuming, and risky process, especially when you have thousands of photos or regular files that are updated. To simplify this process of regularly transferring photos from Google Drive, you can use a professional tool like the Shoviv Google Drive Backup Tool.
Shoviv Google Drive Backup Tool is a one-stop solution for the secure backup of your data on Google Drive data including photos, videos, and documents, directly to your storage in a local way or an external hard drive without the hectic pressure of manual backups.
Primary Features of the Shoviv Google Drive Backup Tool
- Automated Backup:- This tool allows users to schedule the backup at regular intervals so their memories are always protected without the need for manual effort.
- No Restriction:- Easily back up the large volumes of photos without worrying about the compression issues.
- Selective Backup:- With the advanced filters and the settings, you can take the backup of the specified files that you need.
- Incremental:- Avoid duplicity by only backing up the new files.
- User- Friendly Interface:– simple steps make it easy for the non-technical users also.
Simple Guide to Transfer Photos from Google Drive
- Install and run the Shoviv Google Drive Backup Tool.
- Firstly, enter the Job Name.

- Next, connect with the Source Project.
- Select the backup location with the help of the Browse.
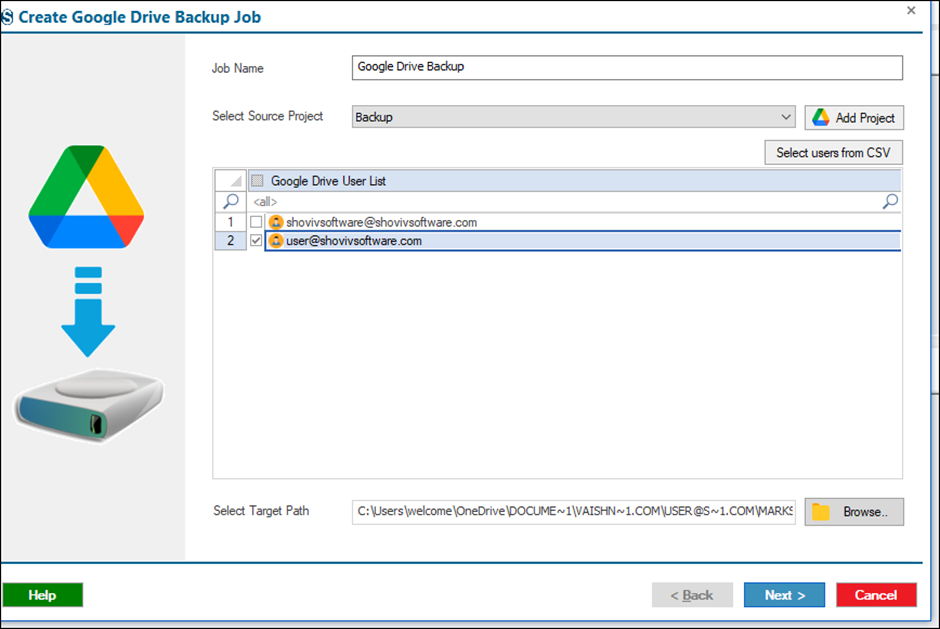
- Set the filter options.

- Choose the settings which you need.
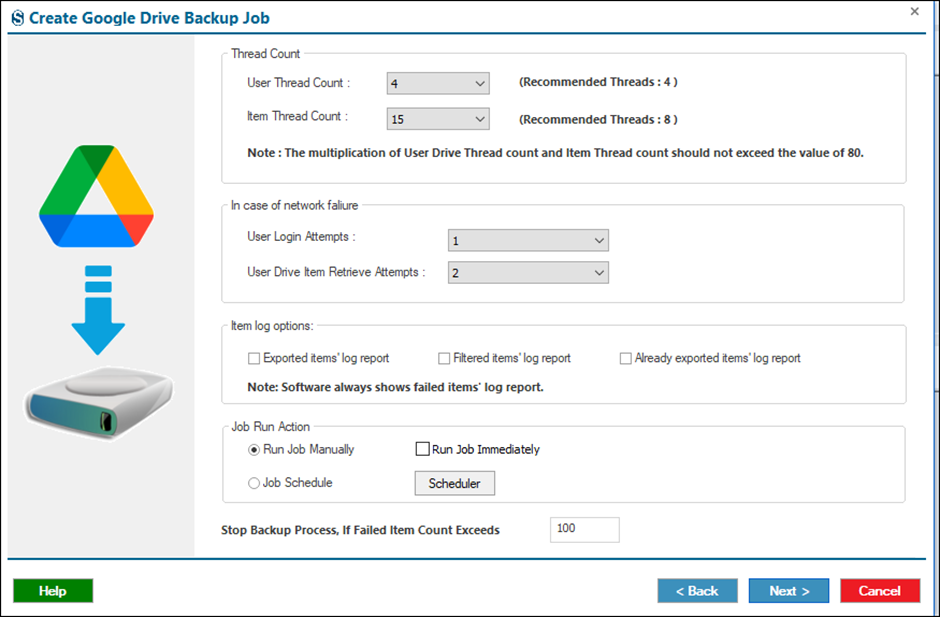
- Review the job details carefully.

- The job runs according to the options that you have chosen within the settings and filters. The tool will automatically transfer photos from Google Drive based on your selected settings.

Conclusion
In conclusion, transferring photos from Google Drive to an external hard drive is a simple and effective way to secure your important data and memories. By downloading your files, extracting them if needed, and moving them in a safe manner to the external storage, you reduce the risk of losing data. Whether done manually or with a tool, regular backups ensure your photos remain safe, organised, and easily accessible to you at any time. For a bulk backup, there is a professional tool: – Shoviv Google Drive Backup Tool comes with advanced features and a user-friendly interface.